2024年还会封城吗互联网关键词优化
目录
一、需要准备的知识点
二、我搭建的环境
三、搭建过程
四、访问链接
五、两个问题点
【整整200集】超超超详细的Python接口自动化测试进阶教程,真实模拟企业项目实战!!
一、需要准备的知识点
1. linux: 安装 python3、nginx 安装和配置、mysql 安装和配置
2. python: django 配置、uwsgi 配置
二、我搭建的环境
1. Centos7 (配置 rabbitmq、mysql 、Supervisord)
2. python 3.6.8 (配置 django、uwsgi)
3. git 1.8.3.1 (克隆代码)
三、搭建过程
1. 配置数据库(安装 mysql ,自行百度)
新建库:httprunner (UI 工具直接新建)
2. 安装 rabbitmq(消息中间件)
3. 克隆代码
git clone https://github.com/HttpRunner/HttpRunnerManager.git
4. 安装项目依赖库
pip install -r requirements.txt
# requirements.txt (celery 需要用到 tornado,建议安装 5.1.1 版本)
[root@gitlab HttpRunnerManager]# cat requirements.txt
Django == 2.0.3
PyYAML == 3.12
requests == 2.18.4
eventlet == 0.22.1
mysqlclient == 1.3.12
django-celery == 3.2.2
flower == 0.9.2
dwebsocket == 0.4.2
paramiko == 2.4.1
HttpRunner == 1.5.8
tornado>=4.2.0,<6.0.0
5. 修改 setting.py 配置文件
"""
Django settings for HttpRunnerManager project.Generated by 'django-admin startproject' using Django 1.11.7.For more information on this file, see
https://docs.djangoproject.com/en/1.11/topics/settings/For the full list of settings and their values, see
https://docs.djangoproject.com/en/1.11/ref/settings/
"""
from __future__ import absolute_import, unicode_literalsimport os# Build paths inside the project like this: os.path.join(BASE_DIR, ...)
import djcelery
from django.conf.global_settings import SESSION_COOKIE_AGEBASE_DIR = os.path.dirname(os.path.dirname(os.path.abspath(__file__)))# Quick-start development settings - unsuitable for production
# See https://docs.djangoproject.com/en/1.11/howto/deployment/checklist/# SECURITY WARNING: keep the secret key used in production secret!
SECRET_KEY = '=w+1if4no=o&6!la#5j)3wsu%k@$)6bf+@3=i0h!5)h9h)$*s7'# SECURITY WARNING: don't run with debug turned on in production!DEBUG = False
# DEBUG = TrueALLOWED_HOSTS = ['*']# Application definitionINSTALLED_APPS = ['django.contrib.admin','django.contrib.auth','django.contrib.contenttypes','django.contrib.sessions','django.contrib.messages','django.contrib.staticfiles','ApiManager','djcelery',
]MIDDLEWARE = ['django.middleware.security.SecurityMiddleware','django.contrib.sessions.middleware.SessionMiddleware','django.middleware.common.CommonMiddleware',# 'django.middleware.csrf.CsrfViewMiddleware','django.contrib.auth.middleware.AuthenticationMiddleware','django.contrib.messages.middleware.MessageMiddleware','django.middleware.clickjacking.XFrameOptionsMiddleware',
]MIDDLEWARE_CLASSES = ['dwebsocket.middleware.WebSocketMiddleware'
]ROOT_URLCONF = 'HttpRunnerManager.urls'TEMPLATES = [{'BACKEND': 'django.template.backends.django.DjangoTemplates','DIRS': [os.path.join(BASE_DIR, 'templates')],'APP_DIRS': True,'OPTIONS': {'context_processors': ['django.template.context_processors.debug','django.template.context_processors.request','django.contrib.auth.context_processors.auth','django.contrib.messages.context_processors.messages',],},},
]WSGI_APPLICATION = 'HttpRunnerManager.wsgi.application'# Password validation
# https://docs.djangoproject.com/en/1.11/ref/settings/#auth-password-validatorsAUTH_PASSWORD_VALIDATORS = [{'NAME': 'django.contrib.auth.password_validation.UserAttributeSimilarityValidator',},{'NAME': 'django.contrib.auth.password_validation.MinimumLengthValidator',},{'NAME': 'django.contrib.auth.password_validation.CommonPasswordValidator',},{'NAME': 'django.contrib.auth.password_validation.NumericPasswordValidator',},
]# Internationalization
# https://docs.djangoproject.com/en/1.11/topics/i18n/LANGUAGE_CODE = 'zh-Hans'TIME_ZONE = 'Asia/Shanghai'USE_I18N = TrueUSE_L10N = TrueUSE_TZ = False# Static files (CSS, JavaScript, Images)
# https://docs.djangoproject.com/en/1.11/howto/static-files/if DEBUG:DATABASES = {'default': {'ENGINE': 'django.db.backends.mysql','NAME': 'HttpRunner',  # 新建数据库名'USER': 'root',  # 数据库登录名'PASSWORD': '123456',  # 数据库登录密码'HOST': '192.168.1.254',  # 数据库所在服务器ip地址'PORT': '3306',  # 监听端口 默认3306即可}}STATICFILES_DIRS = (os.path.join(BASE_DIR, 'static'),  # 静态文件额外目录)
else:DATABASES = {'default': {'ENGINE': 'django.db.backends.mysql','NAME': 'HttpRunner',  # 新建数据库名'USER': 'root',  # 数据库登录名'PASSWORD': '123456',  # 数据库登录密码'HOST': '192.168.1.254',  # 数据库所在服务器ip地址'PORT': '3306',  # 监听端口 默认3306即可}}STATIC_ROOT = os.path.join(BASE_DIR, 'static')STATIC_URL = '/static/'STATICFILES_FINDERS = ('django.contrib.staticfiles.finders.FileSystemFinder','django.contrib.staticfiles.finders.AppDirectoriesFinder'
)SESSION_COOKIE_AGE = 300 * 60djcelery.setup_loader()
CELERY_ENABLE_UTC = True
CELERY_TIMEZONE = 'Asia/Shanghai'
BROKER_URL = 'amqp://guest:guest3@192.168.91.45:5672//' if DEBUG else 'amqp://guest:guest@192.168.1.254:5672//'
CELERYBEAT_SCHEDULER = 'djcelery.schedulers.DatabaseScheduler'
CELERY_RESULT_BACKEND = 'djcelery.backends.database:DatabaseBackend'
CELERY_ACCEPT_CONTENT = ['application/json']
CELERY_TASK_SERIALIZER = 'json'
CELERY_RESULT_SERIALIZER = 'json'CELERY_TASK_RESULT_EXPIRES = 7200  # celery任务执行结果的超时时间,
CELERYD_CONCURRENCY = 1 if DEBUG else 10 # celery worker的并发数 也是命令行-c指定的数目 根据服务器配置实际更改 一般25即可
CELERYD_MAX_TASKS_PER_CHILD = 100  # 每个worker执行了多少任务就会死掉,我建议数量可以大一些,比如200# 发送邮件
EMAIL_HOST = 'smtp.exmail.qq.com'
EMAIL_PORT = 465
EMAIL_USR_SSL = True
EMAIL_SUBJECT_PREFIX = '测试部'
EMAIL_HOST_USER = 'notic@test.com'  # 自己的邮箱
EMAIL_HOST_PASSWORD = "fadfadfdn8hf7AXc"  # 我的邮箱密码EMAIL_SEND_USERNAME = 'notic@test.com'  # 定时任务报告发送邮箱,支持163,qq,sina,企业qq邮箱等,注意需要开通smtp服务
EMAIL_SEND_PASSWORD = 'Frfadfadfhf7AXc'     # 邮箱密码LOGGING = {'version': 1,'disable_existing_loggers': True,'formatters': {'standard': {'format': '%(asctime)s [%(name)s:%(lineno)d] [%(module)s:%(funcName)s] [%(levelname)s]- %(message)s'}# 日志格式},'filters': {},'handlers': {'mail_admins': {'level': 'ERROR','class': 'django.utils.log.AdminEmailHandler','include_html': True,},'default': {'level': 'DEBUG','class': 'logging.handlers.RotatingFileHandler','filename': os.path.join(BASE_DIR, 'logs/all.log'),'maxBytes': 1024 * 1024 * 100,'backupCount': 5,'formatter': 'standard',},'console': {'level': 'DEBUG','class': 'logging.StreamHandler','formatter': 'standard'},'request_handler': {'level': 'DEBUG','class': 'logging.handlers.RotatingFileHandler','filename': os.path.join(BASE_DIR, 'logs/script.log'),'maxBytes': 1024 * 1024 * 100,'backupCount': 5,'formatter': 'standard',},'scprits_handler': {'level': 'DEBUG','class': 'logging.handlers.RotatingFileHandler','filename': os.path.join(BASE_DIR, 'logs/script.log'),'maxBytes': 1024 * 1024 * 100,'backupCount': 5,'formatter': 'standard',},},'loggers': {'django': {'handlers': ['default', 'console'],'level': 'INFO','propagate': True},'HttpRunnerManager.app': {'handlers': ['default', 'console'],'level': 'DEBUG','propagate': True},'django.request': {'handlers': ['request_handler'],'level': 'DEBUG','propagate': True},'HttpRunnerManager': {'handlers': ['scprits_handler', 'console'],'level': 'DEBUG','propagate': True},'scripts': {'handlers': ['scprits_handler', 'console'],'level': 'DEBUG','propagate': True},}
}
6. django 生成数据库表和字段(在项目路径下执行)
#生成数据迁移脚本
python manage.py makemigrations ApiManager
#应用到db生成数据表
python manage.py migrate
7. 创建 django 管理后台的超级账户
python manage.py createsuperuser8. 安装 和 配置 uwsgi
安装:pip install uwsgi
配置:ini_hrm.ini
[uwsgi]
socket = 127.0.0.1:9092
#socket = 127.0.0.1:3031
stats = 127.0.0.1:9193
chdir = /root/TestProject/HttpRunnerManager
wsgi-file = /root/TestProject/HttpRunnerManager/HttpRunnerManager/wsgi.py
# module = Joyo.settings
virtualenv = /root/.envs/hrm
pidfile = /root/TestProject/running/uwsgi_hrm.pid
touch-reload = /root/TestProject/running/uwsgi_hrm.pid
# py-auto-reload = 1
buffer-size = 32768
processes = 1
workers=2
# threads = 2
daemonize = /root/TestProject/logs/uwsgi_hrm.log
9. 配置 Nginx
10. 启动 Nginx
/usr/local/nginx/sbin/nginx -c /usr/local/nginx/conf/nginx.conf
11. 启动 uwsgi
/root/.envs/hrm/bin/uwsgi --ini /root/TestProject/configs/ini_hrm.ini
12. Supervisor 守护 Celery worker、beat、flower
四、访问链接
1. django 后台
url: http://192.168.1.254/admin/login/?next=/admin/
id: root
pw: abc123456
2. rabbitmq
url: http://192.168.1.254:15672/#/ id: guest pw: guest
3. HttpRunnerManager
注册:http://192.168.1.254:8000/api/register/ 登录:http://192.168.1.254:8000/api/login/
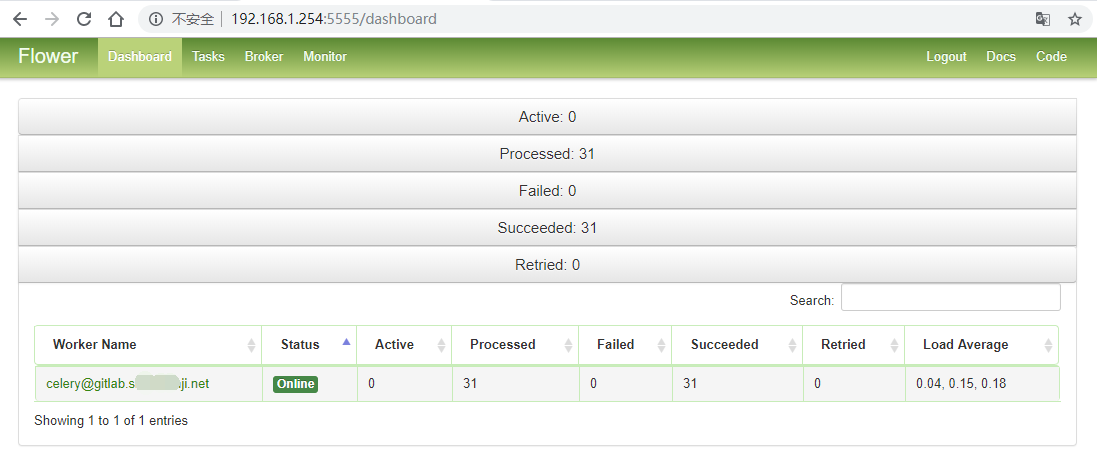
4. Celery 任务监控后台
url: http://192.168.1.254:5555/dashboard
五、两个问题点
1. 启动 django 项目时,ImportError: No module named 'MySQLdb':
安装 pymysql: pip install pymysql
在 Django 项目中的 HttpRunnerManager/__init__.py 中引用:
import pymysql
pymysql.install_as_MySQLdb()
2. 打开 HttpRunnerManager 后台时:百度未授权使用地图API
### 来几张图