做网站用什么配置的vps广州seo做得比较好的公司
提示:文章写完后,目录可以自动生成,如何生成可参考右边的帮助文档
前言
课程要点
结合html等场景 做滚动动画
1.遇到的问题, 在向下滚动时,下方会显白(部分浏览器)
解决:alpha:true ,在WebGLRenderer 中设置alpha : true ; 同时在style.css文件中设置html 背景颜色
2.添加 圆环,锥型,圆环纠结形状
3.添加材质 卡通 由于 卡通对光 才能看见 因此 加一个定向光
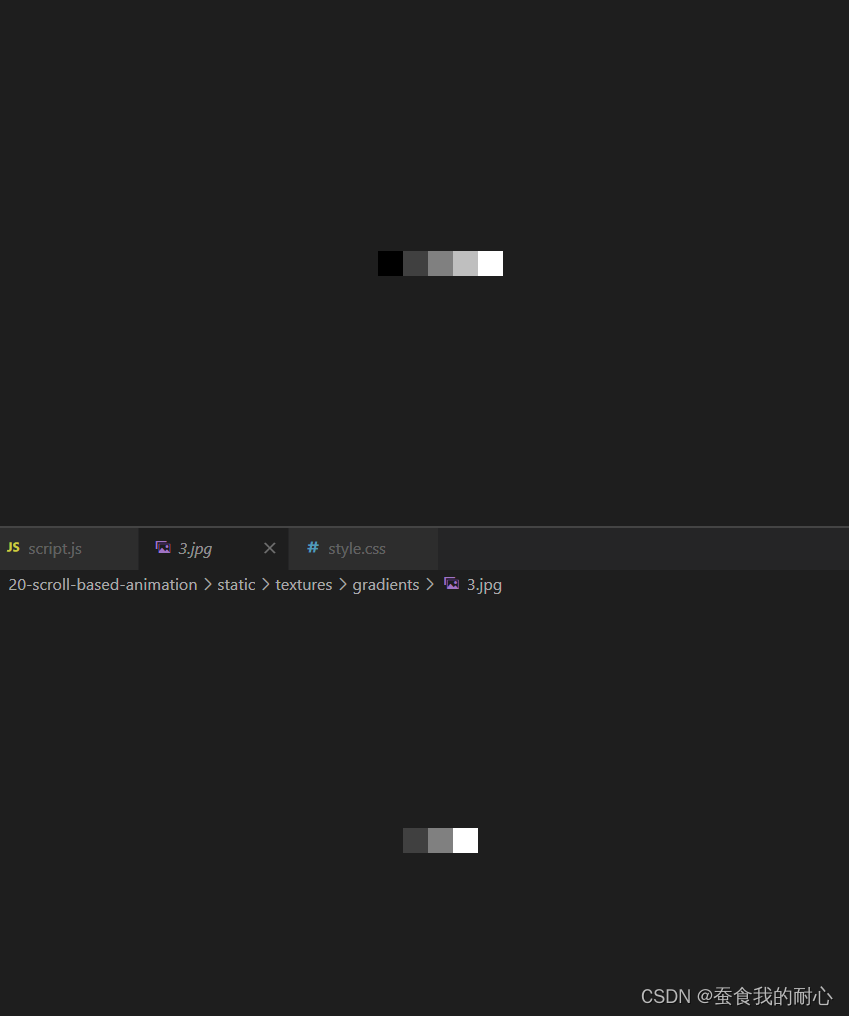
4.此时 显示的颜色是两种 ,但是根据文档 可以看到有三种色, 因此可以通过 纹理实现
gradientTexture.magFilter = THREE.NearestFilter
5.设置位置,同时转动
6.向下移动网页 更改camera视角
7. 视差 :通过不同观察点看到一个物体的行为
希望能有深度 ,在鼠标移动时,相机视角能有适当的强度变化
实现: 由于滚动 和 移动鼠标都是 移动camera视角 导致 滚动不生效
1. 创建组 ,在视差时候 移动组, 而camera在组中, 滚动时 移动相机 解决
8.实现平滑 缓慢 移动 速度不要太快
9.实现在不同电脑中 不同屏幕频率相同的移动速度
let previousTime = 0
const deltaTime = elapsedTime - previousTime
previousTime = elapsedTime
10. GSAP
一、代码
import * as THREE from 'three'
import * as dat from 'lil-gui'
import gsap from 'gsap'/*** Debug*/
const gui = new dat.GUI()const parameters = {materialColor: '#ffeded'
}gui.addColor(parameters, 'materialColor').onChange(()=>{material.color.set(parameters.materialColor)particleMaterial.color.set(parameters.materialColor)})/*** Base*/
// Canvas
const canvas = document.querySelector('canvas.webgl')// Scene
const scene = new THREE.Scene()/* Objects
*/
// Texture
const textureLoad = new THREE.TextureLoader()
const gradientTexture =  textureLoad.load('/textures/gradients/3.jpg')
gradientTexture.magFilter = THREE.NearestFilter // 设置最近过滤器 牵扯到WebGL原理// Material
const material = new THREE.MeshToonMaterial({color:parameters.materialColor,gradientMap:gradientTexture,
}) // 卡通材质 有光的情况才会出现//  Meshs
const objectsDistance = 4
const mesh1 = new THREE.Mesh(new THREE.TorusGeometry(1,0.4,16,60),  // 环形material
)
const mesh2 = new THREE.Mesh(new THREE.ConeGeometry(1,2,32), // 锥material
)
const mesh3 = new THREE.Mesh(new THREE.TorusKnotGeometry(0.8, 0.35, 100, 16), // 环形缓冲material
)
// mesh1.position.y = 2
// mesh1.scale.set(0.5,0.5,0.5)// mesh2.visible = false// mesh3.position.y = -2
// mesh3.scale.set(0.5,0.5,0.5)const sectionMeshes = [mesh1,mesh2,mesh3]mesh1.position.y = - objectsDistance * 0
mesh2.position.y = - objectsDistance * 1
mesh3.position.y = - objectsDistance * 2mesh1.position.x = 2
mesh2.position.x = -2
mesh3.position.x = 2scene.add(mesh1,mesh2,mesh3)/* Particles
*/
// Geometry
const particleCount = 200
const positions = new Float32Array(particleCount * 3)
for(let i = 0; i< particleCount;i++){positions[i * 3 + 0] = (Math.random() - 0.5) * 10positions[i * 3 + 1] = objectsDistance * 0.5 - Math.random() * objectsDistance * 3positions[i * 3 + 2] = (Math.random() - 0.5) * 10
}const particleGeometry = new THREE.BufferGeometry()
particleGeometry.setAttribute('position',new THREE.BufferAttribute(positions,3))const particleMaterial = new THREE.PointsMaterial()
particleMaterial.size = 0.03
particleMaterial.color = new THREE.Color(parameters.materialColor)
particleMaterial.sizeAttenuation = trueconst particle = new THREE.Points(particleGeometry,particleMaterial
)
scene.add(particle)/* ligths
*/
const directionalLight = new THREE.DirectionalLight('#ffffff',1)
directionalLight.position.set(1,1,0)
scene.add(directionalLight)/*** Sizes*/
const sizes = {width: window.innerWidth,height: window.innerHeight
}window.addEventListener('resize', () =>
{// Update sizessizes.width = window.innerWidthsizes.height = window.innerHeight// Update cameracamera.aspect = sizes.width / sizes.heightcamera.updateProjectionMatrix()// Update rendererrenderer.setSize(sizes.width, sizes.height)renderer.setPixelRatio(Math.min(window.devicePixelRatio, 2))
})/* Group
*/
const cameraGroup = new THREE.Group()
scene.add(cameraGroup)/*** Camera*/
// Base camera
const camera = new THREE.PerspectiveCamera(35, sizes.width / sizes.height, 0.1, 100)
camera.position.z = 6
cameraGroup.add(camera)/*** Renderer*/
const renderer = new THREE.WebGLRenderer({canvas: canvas,alpha:true,
})
renderer.setSize(sizes.width, sizes.height)
renderer.setPixelRatio(Math.min(window.devicePixelRatio, 2))/* Scroll
*/
let scrollY = window.scrollY
let currentSection = 0
window.addEventListener('scroll',()=>{scrollY = window.scrollYconst newSection = Math.round(scrollY / sizes.height) // 四舍五入判断 几何体旋转的时机if(newSection != currentSection){currentSection = newSectionconsole.log(sectionMeshes[currentSection].rotation)gsap.to(sectionMeshes[currentSection].rotation, // 设置动画 0,1,2的动画效果{duration:1.5, // 时间ease:'power2.inOut', // 进出x:'+=6',y:'+=3',z:'+=1.5',})}
})/* Cursor
*/
const cursor = {}
cursor.x = 0
cursor.y = 0window.addEventListener('mousemove',(event)=>{cursor.x = event.clientX / sizes.width - 0.5cursor.y = event.clientY / sizes.height - 0.5
})/*** Animate*/
const clock = new THREE.Clock()
let previousTime = 0
const tick = () =>
{const elapsedTime = clock.getElapsedTime()const deltaTime = elapsedTime - previousTimepreviousTime = elapsedTime// Aniamte Camera   移动的距离/窗口的高度 等于一个单位, *  objectsDistance 距离camera.position.y = - scrollY / sizes.height * objectsDistanceconst parallaxX = cursor.x * 0.5const parallaxY = -cursor.y * 0.5cameraGroup.position.x += (parallaxX - cameraGroup.position.x) * 5 * deltaTimecameraGroup.position.y += (parallaxY - cameraGroup.position.y) * 5 * deltaTime// Aniamte meshesfor(const mesh of sectionMeshes){ // 每一帧变化时,应该改变mesh.rotation.x +=  deltaTime * 0.1mesh.rotation.y +=  deltaTime * 0.12}// Renderrenderer.render(scene, camera)// Call tick again on the next framewindow.requestAnimationFrame(tick)
}tick()
二、知识点
1.原始代码
html代码
<!DOCTYPE html>
<html lang="en">
<head><meta charset="UTF-8"><meta name="viewport" content="width=device-width, initial-scale=1.0"><title>20 - Scroll base animation</title><link rel="stylesheet" href="./style.css">
</head>
<body><canvas class="webgl"></canvas><section class="section"><h1>My Portfolio</h1></section><section class="section"><h2>My projects</h2></section><section class="section"><h2>Contact me</h2></section><script type="module" src="./script.js"></script>
</body>
</html>
script.js
import * as THREE from 'three'
import * as dat from 'lil-gui'/*** Debug*/
const gui = new dat.GUI()const parameters = {materialColor: '#ffeded'
}gui.addColor(parameters, 'materialColor')/*** Base*/
// Canvas
const canvas = document.querySelector('canvas.webgl')// Scene
const scene = new THREE.Scene()/* cube
*/
const cube = new THREE.Mesh(new THREE.BoxGeometry(1,1,1),new THREE.MeshBasicMaterial({color:'red'})
)
scene.add(cube)/*** Sizes*/
const sizes = {width: window.innerWidth,height: window.innerHeight
}window.addEventListener('resize', () =>
{// Update sizessizes.width = window.innerWidthsizes.height = window.innerHeight// Update cameracamera.aspect = sizes.width / sizes.heightcamera.updateProjectionMatrix()// Update rendererrenderer.setSize(sizes.width, sizes.height)renderer.setPixelRatio(Math.min(window.devicePixelRatio, 2))
})/*** Camera*/
// Base camera
const camera = new THREE.PerspectiveCamera(35, sizes.width / sizes.height, 0.1, 100)
camera.position.z = 6
// cameraGroup.add(camera)
scene.add(camera)/*** Renderer*/
const renderer = new THREE.WebGLRenderer({canvas: canvas,
})
renderer.setSize(sizes.width, sizes.height)
renderer.setPixelRatio(Math.min(window.devicePixelRatio, 2))/*** Animate*/
const clock = new THREE.Clock()
let previousTime = 0
const tick = () =>
{const elapsedTime = clock.getElapsedTime()// Renderrenderer.render(scene, camera)// Call tick again on the next framewindow.requestAnimationFrame(tick)
}tick()
css代码
*
{margin: 0;padding: 0;
}/* html,
body
{overflow: hidden;
} */html{background: #1e1a20;
}
.webgl
{position: fixed;top: 0;left: 0;outline: none;
}.section
{display: flex;align-items: center;height: 100vh;position: relative;font-family: 'Cabin', sans-serif;color: #ffeded;text-transform: uppercase;font-size: 7vmin;padding-left: 10%;padding-right: 10%;
}section:nth-child(odd)
{justify-content: flex-end;
}
2.添加圆环,锥型,圆环扭曲 几何体
// Mesh
const mesh1 = new THREE.Mesh(new THREE.TorusGeometry(1,0.4,16,60),new THREE.MeshBasicMaterial({color:'red'})
)
const mesh2 = new THREE.Mesh(new THREE.ConeGeometry(1,2,32),new THREE.MeshBasicMaterial({color:'red'})
)
const mesh3 = new THREE.Mesh(new THREE.TorusKnotGeometry(0.8, 0.35, 100, 16),new THREE.MeshBasicMaterial({color:'red'})
)
scene.add(mesh1,mesh2,mesh3)

参数可以在three.js文档中查看,挤在一起有点丑,更改位置,添加纹理和卡通材质,由于卡通材质在光下显示 所以要在添加一个定向光 ,
// material
const material = new THREE.MeshToonMaterial({color:'#ffffff'
})// Mesh
const mesh1 = new THREE.Mesh(new THREE.TorusGeometry(1,0.4,16,60),material
)
const mesh2 = new THREE.Mesh(new THREE.ConeGeometry(1,2,32),material
)
const mesh3 = new THREE.Mesh(new THREE.TorusKnotGeometry(0.8, 0.35, 100, 16),material
)
scene.add(mesh1,mesh2,mesh3)/* Lights
*/
const directionalLight = new THREE.DirectionalLight('#ffffff',1)
directionalLight.position.set(1,1,0)
scene.add(directionalLight)

可以看到明暗变化,但是对比官网中 显示的颜色有三种
如何实现 ?
通过纹理设置实现,通过设置这种贴图实现光的变化
不过还需要设置最近过滤器 ,这样能有明显的渐变
对比一下设置 和没设置的图
const textureLoad = new THREE.TextureLoader()
const gradientTexture = textureLoad.load('/textures/gradients/3.jpg')
gradientTexture.magFilter = THREE.NearestFilter // 设置最近过滤器 牵扯到WebGL原理// material
const material = new THREE.MeshToonMaterial({color:parameters.materialColor,gradientMap:gradientTexture  // 卡通色渐变贴图 需要设置这个
})// Mesh
const mesh1 = new THREE.Mesh(new THREE.TorusGeometry(1,0.4,16,60),material
)
const mesh2 = new THREE.Mesh(new THREE.ConeGeometry(1,2,32),material
)
const mesh3 = new THREE.Mesh(new THREE.TorusKnotGeometry(0.8, 0.35, 100, 16),material
)
scene.add(mesh1,mesh2,mesh3)/* Lights
*/
const directionalLight = new THREE.DirectionalLight('#ffffff',1)
directionalLight.position.set(1,1,0)
scene.add(directionalLight)


设置位置,同时让几何体转动,并且 相机随滚动条视角移动,观测不同的几何体状态
import * as THREE from 'three'
import * as dat from 'lil-gui'/*** Debug*/
const gui = new dat.GUI()const parameters = {materialColor: '#ffeded'
}gui.addColor(parameters, 'materialColor')/*** Base*/
// Canvas
const canvas = document.querySelector('canvas.webgl')// Scene
const scene = new THREE.Scene()/* Objects
*/
// Texture
const textureLoad = new THREE.TextureLoader()
const gradientTexture = textureLoad.load('/textures/gradients/3.jpg')
gradientTexture.magFilter = THREE.NearestFilter // 设置最近过滤器 牵扯到WebGL原理// material
const material = new THREE.MeshToonMaterial({color:parameters.materialColor,gradientMap:gradientTexture  // 卡通色渐变贴图 需要设置这个
})// Mesh
const objectsDistance = 4
const mesh1 = new THREE.Mesh(new THREE.TorusGeometry(1,0.4,16,60),material
)
const mesh2 = new THREE.Mesh(new THREE.ConeGeometry(1,2,32),material
)
const mesh3 = new THREE.Mesh(new THREE.TorusKnotGeometry(0.8, 0.35, 100, 16),material
)const sectionMeshes = [mesh1,mesh2,mesh3]mesh1.position.y = - objectsDistance * 0
mesh2.position.y = - objectsDistance * 1
mesh3.position.y = - objectsDistance * 2mesh1.position.x = 2
mesh2.position.x = -2
mesh3.position.x = 2scene.add(mesh1,mesh2,mesh3)/* Lights
*/
const directionalLight = new THREE.DirectionalLight('#ffffff',1)
directionalLight.position.set(1,1,0)
scene.add(directionalLight)/*** Sizes*/
const sizes = {width: window.innerWidth,height: window.innerHeight
}window.addEventListener('resize', () =>
{// Update sizessizes.width = window.innerWidthsizes.height = window.innerHeight// Update cameracamera.aspect = sizes.width / sizes.heightcamera.updateProjectionMatrix()// Update rendererrenderer.setSize(sizes.width, sizes.height)renderer.setPixelRatio(Math.min(window.devicePixelRatio, 2))
})/*** Camera*/
// Base camera
const camera = new THREE.PerspectiveCamera(35, sizes.width / sizes.height, 0.1, 100)
camera.position.z = 6
// cameraGroup.add(camera)
scene.add(camera)/*** Renderer*/
const renderer = new THREE.WebGLRenderer({canvas: canvas,alpha:true,
})
renderer.setSize(sizes.width, sizes.height)
renderer.setPixelRatio(Math.min(window.devicePixelRatio, 2))/* Scroll
*/
let scrollY = window.scrollY // 获取滚动条y的数据
let currentSection = 0
window.addEventListener('scroll',()=>{scrollY = window.scrollY
})/*** Animate*/
const clock = new THREE.Clock()
let previousTime = 0
const tick = () =>
{const elapsedTime = clock.getElapsedTime()// Aniamte Camera   // 由于几何体 沿着y轴移动 objectsDistance 单位 所以 scrollY / sizes.height 是一比一的,* objectsDistance 就有了四个单位 camera.position.y = - scrollY / sizes.height * objectsDistance// Aniamte meshesfor(const mesh of sectionMeshes){ // 每一帧变化时,应该改变mesh.rotation.x =  elapsedTimemesh.rotation.y =  elapsedTime + 0.1}// Renderrenderer.render(scene, camera)// Call tick again on the next framewindow.requestAnimationFrame(tick)
}tick()
camera视角
视差 :通过不同观察点看到一个物体的行为
希望能有深度 ,在鼠标移动时,相机视角能有适当的强度变化
实现: 由于滚动 和 移动鼠标都是 移动camera视角 导致 滚动不生效
1. 创建组 ,在视差时候 移动组, 而camera在组中, 滚动时 移动相机 解决
实现平滑 缓慢 移动 速度不要太快
实现在不同电脑中 不同屏幕频率相同的移动速度
let previousTime = 0
const deltaTime = elapsedTime - previousTime
previousTime = elapsedTime
import * as THREE from 'three'
import * as dat from 'lil-gui'/*** Debug*/
const gui = new dat.GUI()const parameters = {materialColor: '#ffeded'
}gui.addColor(parameters, 'materialColor')/*** Base*/
// Canvas
const canvas = document.querySelector('canvas.webgl')// Scene
const scene = new THREE.Scene()/* Objects
*/
// Texture
const textureLoad = new THREE.TextureLoader()
const gradientTexture = textureLoad.load('/textures/gradients/3.jpg')
gradientTexture.magFilter = THREE.NearestFilter // 设置最近过滤器 牵扯到WebGL原理// material
const material = new THREE.MeshToonMaterial({color:parameters.materialColor,gradientMap:gradientTexture  // 卡通色渐变贴图 需要设置这个
})// Mesh
const objectsDistance = 4
const mesh1 = new THREE.Mesh(new THREE.TorusGeometry(1,0.4,16,60),material
)
const mesh2 = new THREE.Mesh(new THREE.ConeGeometry(1,2,32),material
)
const mesh3 = new THREE.Mesh(new THREE.TorusKnotGeometry(0.8, 0.35, 100, 16),material
)const sectionMeshes = [mesh1,mesh2,mesh3]mesh1.position.y = - objectsDistance * 0
mesh2.position.y = - objectsDistance * 1
mesh3.position.y = - objectsDistance * 2mesh1.position.x = 2
mesh2.position.x = -2
mesh3.position.x = 2scene.add(mesh1,mesh2,mesh3)/* Lights
*/
const directionalLight = new THREE.DirectionalLight('#ffffff',1)
directionalLight.position.set(1,1,0)
scene.add(directionalLight)/*** Sizes*/
const sizes = {width: window.innerWidth,height: window.innerHeight
}window.addEventListener('resize', () =>
{// Update sizessizes.width = window.innerWidthsizes.height = window.innerHeight// Update cameracamera.aspect = sizes.width / sizes.heightcamera.updateProjectionMatrix()// Update rendererrenderer.setSize(sizes.width, sizes.height)renderer.setPixelRatio(Math.min(window.devicePixelRatio, 2))
})/* Group
*/
const cameraGroup = new THREE.Group()
scene.add(cameraGroup)/*** Camera*/
// Base camera
const camera = new THREE.PerspectiveCamera(35, sizes.width / sizes.height, 0.1, 100)
camera.position.z = 6
cameraGroup.add(camera)/*** Renderer*/
const renderer = new THREE.WebGLRenderer({canvas: canvas,alpha:true,
})
renderer.setSize(sizes.width, sizes.height)
renderer.setPixelRatio(Math.min(window.devicePixelRatio, 2))/* Scroll
*/
let scrollY = window.scrollY // 获取滚动条y的数据
let currentSection = 0
window.addEventListener('scroll',()=>{scrollY = window.scrollY
})/* Cursor
*/
const cursor = {}
cursor.x = 0
cursor.y = 0window.addEventListener('mousemove',(event)=>{cursor.x = event.clientX / sizes.width - 0.5cursor.y = event.clientY / sizes.height - 0.5
})/*** Animate*/
const clock = new THREE.Clock()
let previousTime = 0
const tick = () =>
{const elapsedTime = clock.getElapsedTime()const deltaTime = elapsedTime - previousTimepreviousTime = elapsedTime// Aniamte Camera   // 由于几何体 沿着y轴移动 objectsDistance 单位 所以 scrollY / sizes.height 是一比一的,* objectsDistance 就有了四个单位 camera.position.y = - scrollY / sizes.height * objectsDistanceconst parallaxX = cursor.x * 0.5const parallaxY = -cursor.y * 0.5cameraGroup.position.x += (parallaxX - cameraGroup.position.x) * 5 * deltaTimecameraGroup.position.y += (parallaxY - cameraGroup.position.y) * 5 * deltaTime// Aniamte meshesfor(const mesh of sectionMeshes){ // 每一帧变化时,应该改变mesh.rotation.x +=  deltaTime * 0.1mesh.rotation.y +=  deltaTime * 0.12}// Renderrenderer.render(scene, camera)// Call tick again on the next framewindow.requestAnimationFrame(tick)
}tick()
camera 视角移动
添加粒子特效
/* Particles
*/
const particleCount = 200
const positions = new Float32Array(particleCount * 3)
// 设置粒子位置
for(let i = 0; i< particleCount;i++){positions[i * 3 + 0] = (Math.random() - 0.5) * 10positions[i * 3 + 1] = objectsDistance * 0.5 - Math.random() * objectsDistance * 3positions[i * 3 + 2] = (Math.random() - 0.5) * 10
}
const particleGeometry = new THREE.BufferGeometry()
particleGeometry.setAttribute('position',new THREE.BufferAttribute(positions,3))const particleMaterial = new THREE.PointsMaterial()
particleMaterial.size = 0.03
particleMaterial.color = new THREE.Color(parameters.materialColor)
particleMaterial.sizeAttenuation = true // 衰减const particle = new THREE.Points(particleGeometry,particleMaterial
)
scene.add(particle)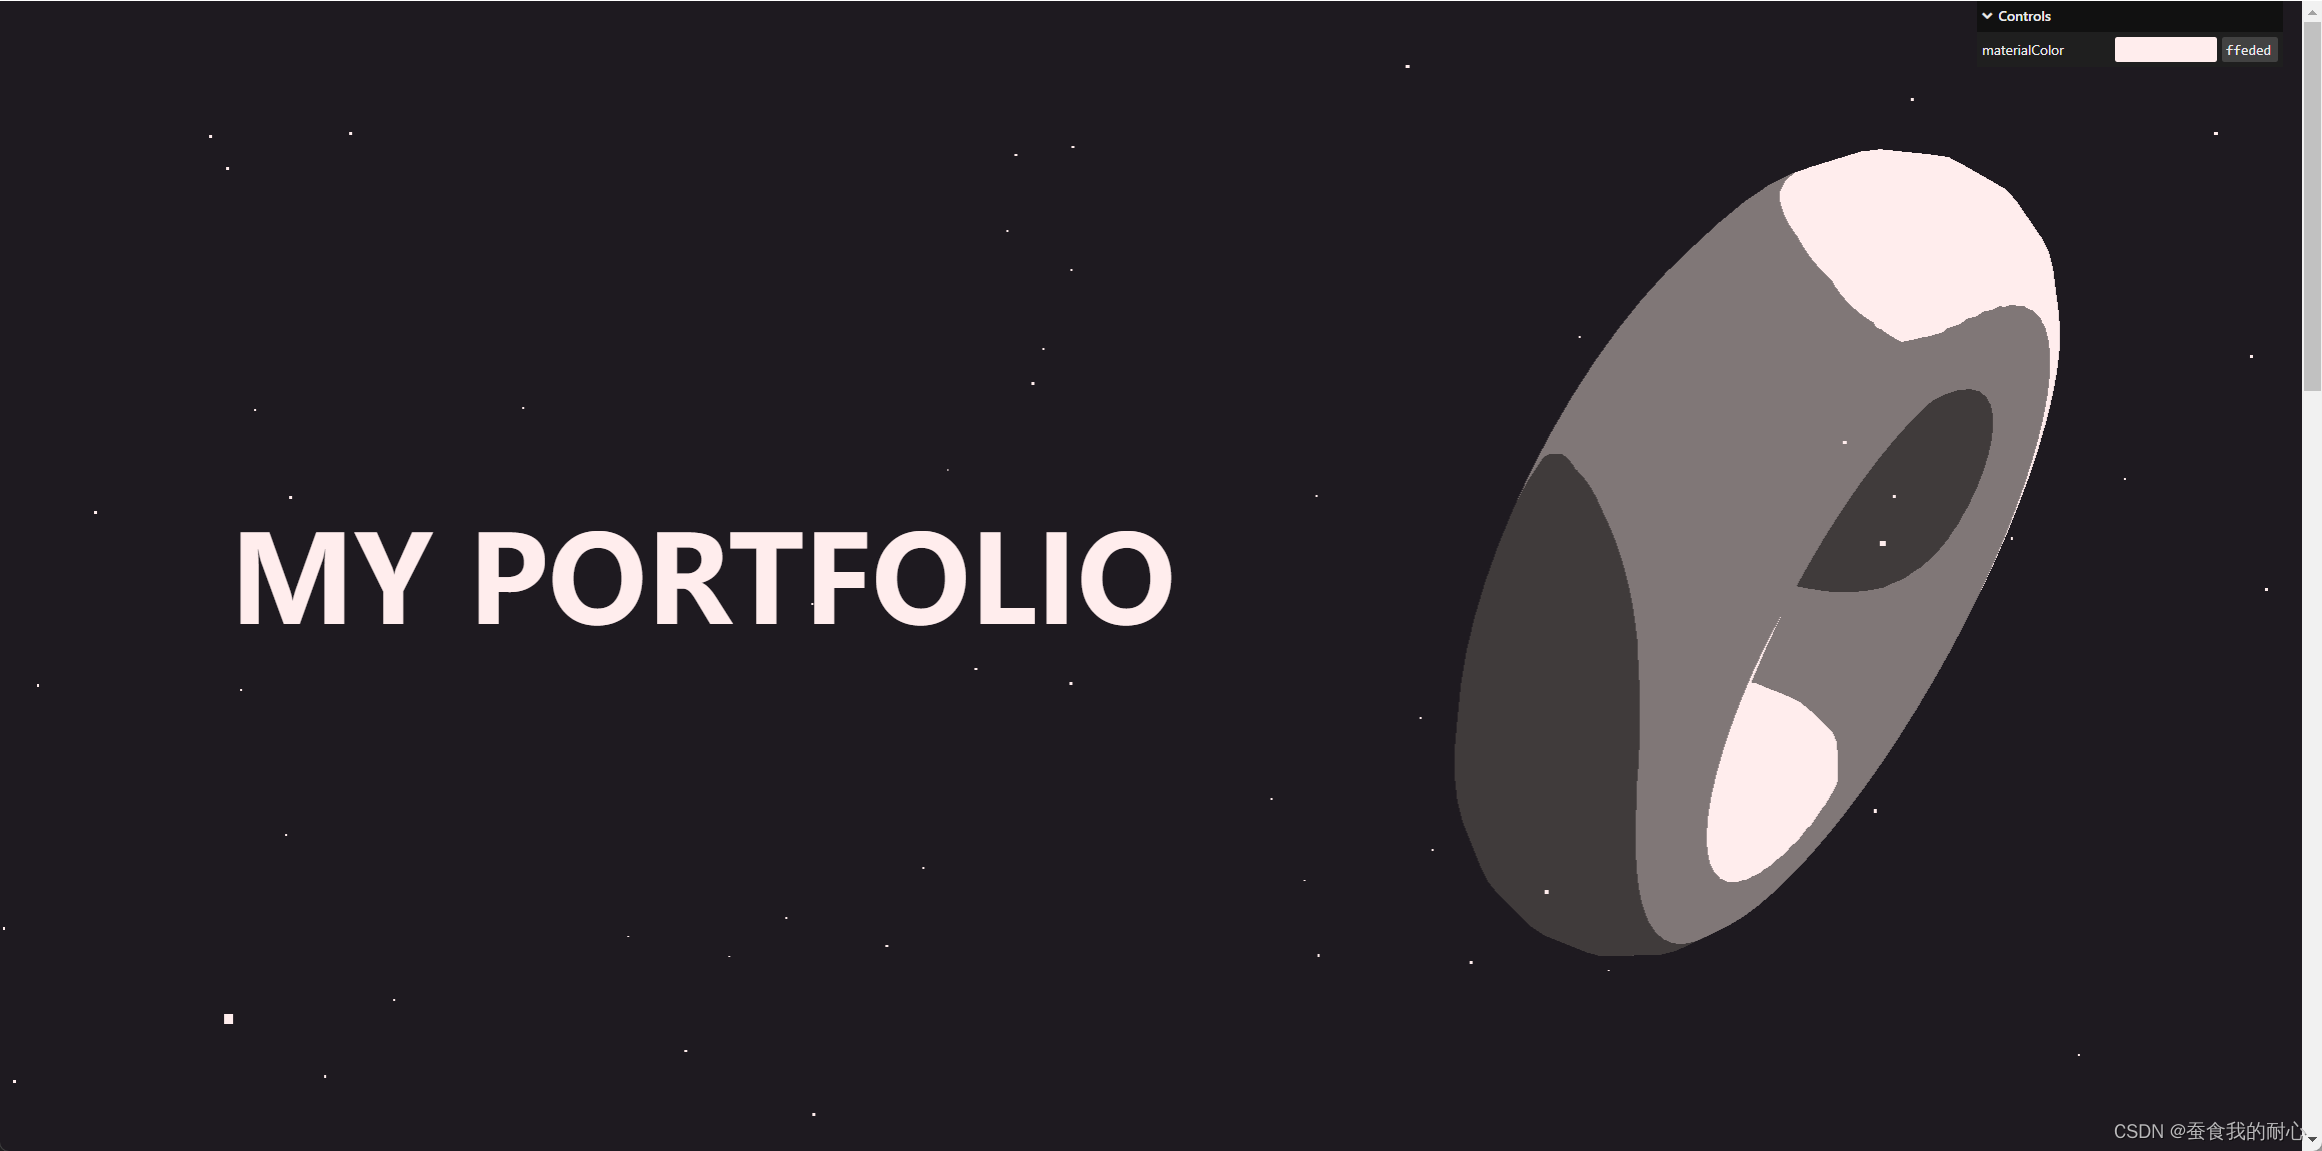
3.gsap
实现动画效果,在到达某一个几何体时 进行旋转
npm i gasp@3.5.1
import * as THREE from 'three'
import * as dat from 'lil-gui'
import gsap from 'gsap'/*** Debug*/
const gui = new dat.GUI()const parameters = {materialColor: '#ffeded'
}gui.addColor(parameters, 'materialColor').onChange(()=>{material.color.set(parameters.materialColor)particleMaterial.color.set(parameters.materialColor)})/*** Base*/
// Canvas
const canvas = document.querySelector('canvas.webgl')// Scene
const scene = new THREE.Scene()/* Objects
*/
// Texture
const textureLoad = new THREE.TextureLoader()
const gradientTexture = textureLoad.load('/textures/gradients/3.jpg')
gradientTexture.magFilter = THREE.NearestFilter // 设置最近过滤器 牵扯到WebGL原理// material
const material = new THREE.MeshToonMaterial({color:parameters.materialColor,gradientMap:gradientTexture  // 卡通色渐变贴图 需要设置这个
})// Mesh
const objectsDistance = 4
const mesh1 = new THREE.Mesh(new THREE.TorusGeometry(1,0.4,16,60),material
)
const mesh2 = new THREE.Mesh(new THREE.ConeGeometry(1,2,32),material
)
const mesh3 = new THREE.Mesh(new THREE.TorusKnotGeometry(0.8, 0.35, 100, 16),material
)const sectionMeshes = [mesh1,mesh2,mesh3]mesh1.position.y = - objectsDistance * 0
mesh2.position.y = - objectsDistance * 1
mesh3.position.y = - objectsDistance * 2mesh1.position.x = 2
mesh2.position.x = -2
mesh3.position.x = 2scene.add(mesh1,mesh2,mesh3)/* Particles
*/
const particleCount = 200
const positions = new Float32Array(particleCount * 3)
// 设置粒子位置
for(let i = 0; i< particleCount;i++){positions[i * 3 + 0] = (Math.random() - 0.5) * 10positions[i * 3 + 1] = objectsDistance * 0.5 - Math.random() * objectsDistance * 3positions[i * 3 + 2] = (Math.random() - 0.5) * 10
}
const particleGeometry = new THREE.BufferGeometry()
particleGeometry.setAttribute('position',new THREE.BufferAttribute(positions,3))const particleMaterial = new THREE.PointsMaterial()
particleMaterial.size = 0.03
particleMaterial.color = new THREE.Color(parameters.materialColor)
particleMaterial.sizeAttenuation = true // 衰减const particle = new THREE.Points(particleGeometry,particleMaterial
)
scene.add(particle)/* Lights
*/
const directionalLight = new THREE.DirectionalLight('#ffffff',1)
directionalLight.position.set(1,1,0)
scene.add(directionalLight)/*** Sizes*/
const sizes = {width: window.innerWidth,height: window.innerHeight
}window.addEventListener('resize', () =>
{// Update sizessizes.width = window.innerWidthsizes.height = window.innerHeight// Update cameracamera.aspect = sizes.width / sizes.heightcamera.updateProjectionMatrix()// Update rendererrenderer.setSize(sizes.width, sizes.height)renderer.setPixelRatio(Math.min(window.devicePixelRatio, 2))
})/* Group
*/
const cameraGroup = new THREE.Group()
scene.add(cameraGroup)/*** Camera*/
// Base camera
const camera = new THREE.PerspectiveCamera(35, sizes.width / sizes.height, 0.1, 100)
camera.position.z = 6
cameraGroup.add(camera)/*** Renderer*/
const renderer = new THREE.WebGLRenderer({canvas: canvas,alpha:true,
})
renderer.setSize(sizes.width, sizes.height)
renderer.setPixelRatio(Math.min(window.devicePixelRatio, 2))/* Scroll
*/
let scrollY = window.scrollY // 获取滚动条y的数据
let currentSection = 0
window.addEventListener('scroll',()=>{scrollY = window.scrollYconst newSection = Math.round(scrollY / sizes.height) // 四舍五入判断 几何体旋转的时机if(newSection != currentSection){currentSection = newSectionconsole.log(sectionMeshes[currentSection].rotation)gsap.to(sectionMeshes[currentSection].rotation, // 设置动画 0,1,2的动画效果{duration:1.5, // 时间ease:'power2.inOut', // 进出x:'+=6',y:'+=3',z:'+=1.5',})}
})/* Cursor
*/
const cursor = {}
cursor.x = 0
cursor.y = 0window.addEventListener('mousemove',(event)=>{cursor.x = event.clientX / sizes.width - 0.5cursor.y = event.clientY / sizes.height - 0.5
})/*** Animate*/
const clock = new THREE.Clock()
let previousTime = 0
const tick = () =>
{const elapsedTime = clock.getElapsedTime()const deltaTime = elapsedTime - previousTimepreviousTime = elapsedTime// Aniamte Camera   // 由于几何体 沿着y轴移动 objectsDistance 单位 所以 scrollY / sizes.height 是一比一的,* objectsDistance 就有了四个单位 camera.position.y = - scrollY / sizes.height * objectsDistanceconst parallaxX = cursor.x * 0.5const parallaxY = -cursor.y * 0.5cameraGroup.position.x += (parallaxX - cameraGroup.position.x) * 5 * deltaTimecameraGroup.position.y += (parallaxY - cameraGroup.position.y) * 5 * deltaTime// Aniamte meshesfor(const mesh of sectionMeshes){ // 每一帧变化时,应该改变mesh.rotation.x +=  deltaTime * 0.1mesh.rotation.y +=  deltaTime * 0.12}// Renderrenderer.render(scene, camera)// Call tick again on the next framewindow.requestAnimationFrame(tick)
}tick()
camera 视角移动 几何体动画
总结
数学不要记,主要看他怎么用, 在哪里用的!